Whether you’re embarking on a weekend camping trip or a month-long tour of National Parks across the American Southwest, having reliable access to clean, safe drinking water is essential for any RV excursion. While modern campers and recreational vehicles make it possible to enjoy outdoor recreation in remote locations far from home, it’s imperative that owners properly maintain the fresh water systems on these RVs to get the most out of them.
One key maintenance task is to regularly sanitize the fresh water holding tank. This is necessary to eliminate any bacteria or other contaminants that may have accumulated inside the otherwise sealed tank. By taking the time to deep clean the water tank on a regular basis, you can have peace of mind knowing you’re provided with only the highest quality H2O for drinking, cooking, showering, and other activities throughout your travels.
In this guide, we will provide a complete step-by-step process for sanitizing your RV or camper’s fresh water tank. From gathering the necessary supplies to thorough cleaning methods, you will gain all the knowledge needed to ensure your tank is fully sanitized and safe. Following these steps will allow you to enjoy all the convenience of onboard water wherever your camping adventures may lead.

How To Sanitize Your Camper Water Tank
Step 1: Drain the fresh water tank.
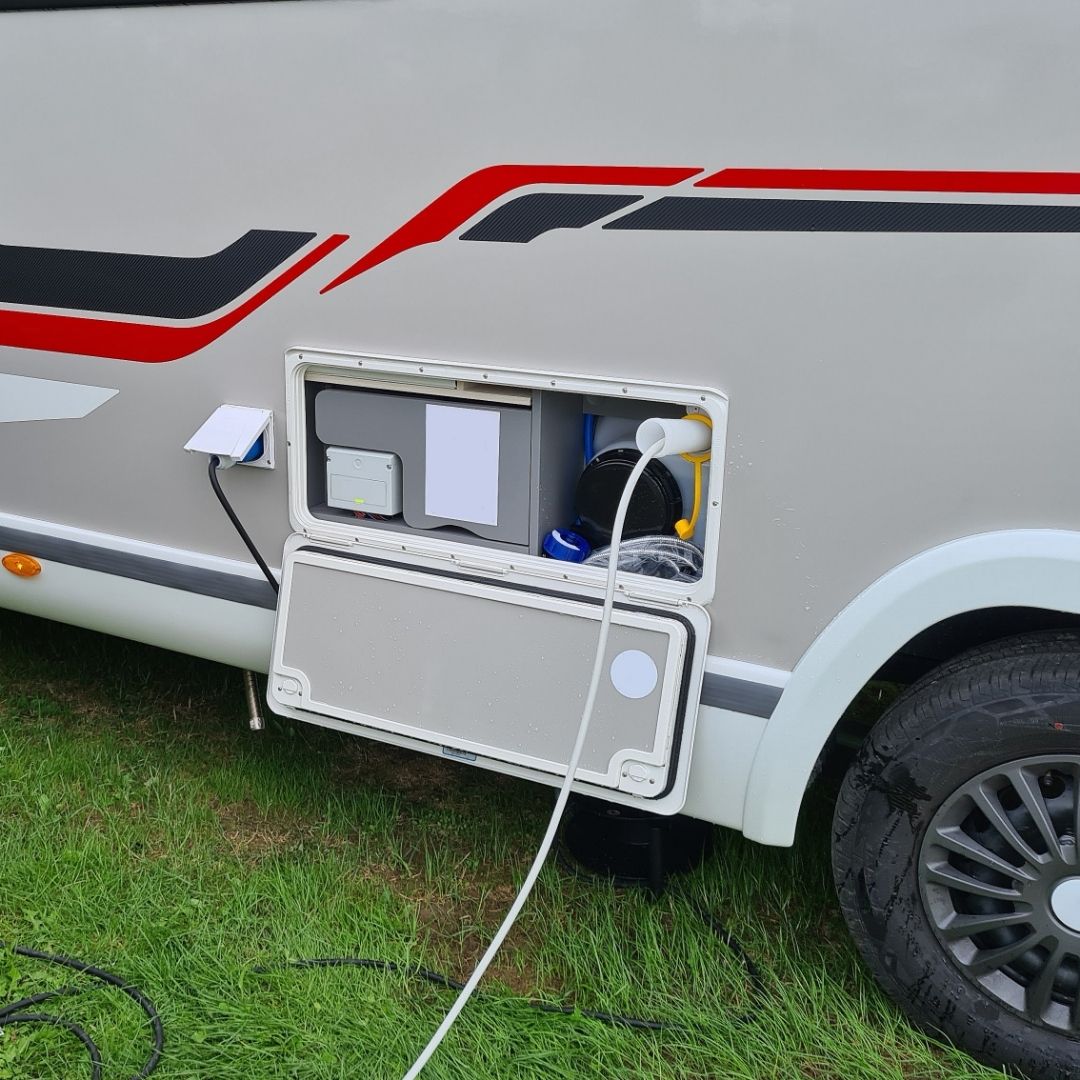
To start, you’ll need to locate your fresh water tank drain valve. This is typically found towards the underside of the vehicle, often near the city water connection point. Tank locations can vary between coach models, so consult your owner’s manual for exact placement if needed. Once you’ve identified the thin, spigot-style drain valve, it’s time to attach a garden hose. Make sure to route the hose end a good distance away to a patch of loose soil safe for catching any wastewater runoff.
To open the drain, first, check that the valve handle is in line with the pipe flow direction. Then, turn the handle counterclockwise until fully open. The water may start flowing freely right away or require a light squeeze on the hose to begin evacuating from the tank. Maintain pressure as needed until no more liquid comes out.
For tanks with multiple drains, make sure each is cracked open during the process. This includes exterior, sometimes color-coded pipes leading from hot water lines and other sub-system drain points. Being thorough at this early stage helps ensure a deep clean for your entire freshwater system.
Once the last drops fall from the hose end, it’s time to securely close all drain valves to prepare for the next sanitizing steps. Take care not to overtighten nylon or plastic handles which could strip or break off over time.
Step 2: Prepare the sanitizing solution.
With empty tanks now ready for cleaning, it’s time to mix up the disinfecting solution that will sanitize the interior. The most common method uses an unscented household bleach mixed with water. Bleach is an effective choice because its active ingredient, sodium hypochlorite, kills microbes by attacking their cell walls and essential protein structures.
To determine proper bleach concentration, you’ll need to know your tank’s total volume in gallons. This specification is usually printed on a label inside the tank itself or within your RV owner’s manual. As a general rule, use 1⁄4 cup of bleach for every 15-20 gallons of tank size. So, for a 30-gallon tank, measure 3⁄4 cup bleach.
With the measuring cup rinsed and dried, carefully pour the bleach directly into a one-gallon plastic jug provided for transporting and dispersing the solution. NEVER add bleach straight to the tank, as its high density could leave harmful residues.
Next, fill the remaining jug space with cool water from your outdoor spigot. Seal the jug tightly once full to contain vapors. At this point, gently tip and tilt the sealed jug to fully integrate the bleach and water without splashing.
Step 3. Circulate the sanitizing solution.
Using the sealed jug, slowly pour the bleach-water mixture into the freshwater fill port using a funnel. Try not to splash as you fill the tank, preventing fumes from entering the RV interior. When empty, rinse out any last drops clinging inside with a small amount of fresh water.
After filling the tank, locate your onboard 12V water pump switch or breaker, usually found near the plumbing components. Turn it on to start circulating the solution through the lines. While the pump is running, visit each faucet, showerhead, and other water outlet one by one to ensure the solution flows through all of them.
Carefully open handles slowly at first, in case air pockets cause sputters. Once streams are consistent, run ports for five full minutes to flush all branch lines. Pay special attention to sinks, as years of calcium buildup can harbor bacteria and minerals if not fully dislodged. While flushing, periodically squeeze pliable sections of tubing to purge trapped air.
It’s also important to expel water from the sink and shower P-traps, which collect drain water. Simply pour a small amount down each and wiggle the fixture to release contents, followed by more flushing water. This helps the sanitizing formula reach every nook of your camper’s plumbing network.

Step 4: Let the sanitizing solution sit.
This step is one of the most crucial, as it allows time for a full sanitizing reaction. Most experts recommend leaving the diluted bleach water inside your non-perfuming tanks and lines for at least 8 hours, up to an absolute maximum of 24 hours. Any less may not eliminate all microbes, while more could risk harming rubber or plastic components over long periods.
To ensure thorough coverage during this process, leave all facet handles in the open position to prevent any fumes from getting trapped. If you’re sanitizing in the evening, feel free to stow your RV for the night. Just be sure to set multiple timer reminders to ensure you don’t exceed the maximum contact time.
Feel confident that as time passes, the low-concentration bleach will effectively penetrate every hidden crevice and pore, eliminating any potential contaminants in your freshwater system. Once the waiting period is over, you can begin the final flushing process to prepare for safe water use once again.
Step 5: Flush out the system.
Now that enough time has passed for the sanitizing solution to do its job, it’s time to flush it all out of the system and refill your tank with fresh water. Begin by connecting the hose to a pressurized water source if not already attached. Leave the other end free so it can expel purged water to the ground.
Flip the water pump switch on to re-circulate. Then, one by one, fully open each faucet, showerhead, and other access point used during the previous flushing stage. Pay close attention to leverage shut-off valves that can break if overtightened during this process.
Continue running fresh water through all outlets for 10 full minutes each to displace residue. You may notice persistent odors or slight coloring in initial flows, which should dissipate within a couple of minutes as chlorine is expelled. Periodically inspect flushed water pouring from far ends of lines for any signs of residual tint as well.
Once confident your entire freshwater pipe system has been sufficiently rinsed, you can focus on the last area – the holding tank itself. Locate the drain valve used originally to empty contents. Open it partially to allow a slow purge directly from the tank source as fresh fill water displaces the remaining solution upward and out of the valve hole.
It’s normal for initial flows here to also contain slight odors or shades of pinkish water from remaining chlorine traces deep inside the secluded bladder. Continue flushing the tank interior directly until all water runs completely clear and odorless before closing the drain cock once more.
How Often Should You Sanitize Your RV Water Tank?
The general recommendation is to sanitize your RV’s freshwater tank at least once per year in the early spring. This thorough cleaning is important to do after winterizing your RV system before preparing it for use in the new season.
However, some RVers find it best to complete the sanitization process more frequently, such as every 2-4 weeks, especially if their recreational vehicle has been sitting unused for long stretches of time in between outings. There are some signs that can indicate whether it’s time to clean your freshwater tank again before the standard yearly timetable.
It may be time to clean your freshwater tank again if:
- You have noticed changes in the taste or smell of the water.
- Your RV has been inactive for 2-4 weeks or longer.
- You ended your camping season before winterizing.
- You’re preparing to sell your RV.
- It has been stored over the winter months.
- The tank hasn’t been cleaned in over 6 months.
Paying attention to usage patterns and any changes in water quality can help determine if sanitizing sooner than the annual minimum is needed for your particular situation. Maintaining the cleanliness and safety of the freshwater supply should be a top priority for enjoyable and healthy RV adventures.
How Much Bleach Should You Use to Sanitize a Camper Water Tank?
When using bleach to sanitize a camper’s freshwater tank, it’s important to add the proper concentration. Too much can damage seals and plastics over time, while too little won’t sufficiently disinfect.
Most experts recommend using 1⁄4 cup of sodium hypochlorite bleach (regular unscented household bleach) for every 15-20 gallons of water tank capacity. So, for example, a 30-gallon tank would need around 3⁄4 cups of bleach.
Factors to consider when determining your specific bleach dosage include:
- Size of water tank in gallons (noted in owner’s manual)
- Whether the tank is divided or a single chamber
- Age and condition and existing contaminants
- The length of time the solution will remain in the system
- Intended contact time before flushing
Remember, it’s always best to slightly underdose bleach and flush thoroughly rather than risk harming plumbing components. Before adding any chemicals, be sure the tank has been fully drained and rinsed to allow for thorough disinfection. Proper dilution and safety precautions are important for enjoying clean and safe water while on the road.

Important Considerations Before Sanitizing Your Camper Water Tank
Location
Be sure to sanitize in an area where the wastewater can properly drain away from any landscaped areas, plants, grass, or bodies of water. You’ll want to avoid contaminating the environment when purging potentially chemically treated water from the tanks and lines.
Protective Equipment
Sanitizers like bleach are strong chemicals that can irritate skin and eyes. Always wear gloves and tight-fitting protective eyewear when handling or mixing solutions. Consider also using a mask if dealing with any vapors. Store all chemicals securely out of reach of children and pets.
Toxic Substitutions
Under no circumstances should toxic substances like RV antifreeze be used, even in small amounts. These could potentially contaminate drinking water if not fully flushed. Only use products specified for your freshwater system.
Inspect Water Heater
Draining the tanks provides easy access to also pull and inspect the RV water heater’s sacrificial anodes. These metallic rods corrode inside of the heater tank wall and should be replaced annually or when 75% is degraded.
Well Systems
If using well water, check the owner’s manual on sanitizing any supplemental holding tanks, feed tanks, water purification systems, or whole house filters to keep the entire supply clean.
Manual Referral
Consult your RV manual for specifics like tank sizes, drain locations, plumbing diagrams, and approved sanitization methods/chemicals to best guide the process.
Winterizing with Filter
When properly bleaching and flushing, consider also winterizing your camper and following methods like using a water filter to protect plumbing during storage. For more tips, you can check out my post on “How to Winterize a Camper with a Water Filter”. If you don’t have a water filter and you’re looking to get one, check out my post on Best Water Filters For Your RV.
Taking these extra safety measures and recommendations into account will help achieve thoroughly sanitized freshwater systems for enjoyable camping all season long.
Sanitize your camper water tank from start to finish with ease!
Ensuring the cleanliness and safety of your RV’s fresh water supply is an important part of ownership that enables relaxing escapes wherever adventures may roam. By taking the time regularly, such as seasonally, to deeply sanitize the freshwater holding tank, you maintain your ability to enjoy all the conveniences of onboard water systems.
Following the comprehensive steps outlined in this guide, from complete draining and solution preparation to thorough flushing, will rid your plumbing of any potential contaminants. Making sanitization a priority provides peace of mind during excursions and helps protect plastics and rubber components with proper chemical dilution.
For more information on beneficial water therapies and all things water, stay tuned to my blog. I’m always available to give recommendations, reviews, and health information around water. If you found this particular post helpful, you might want to check out my posts on best portable water filters, best type of water for health, and pros and cons of gravity water filters.
Stay hydrated,
Shashank Varma (Mr. Water Geek).


 English (US) ·